Monday, July 2, 2012
Peter, Peter, Pumpkin Eater
Okay maybe not a pumpkin eater. But definitely a pumpkin wearer. Mr. T looks good in orange (at least I think so) and in homage to my dad and The Netherlands, I've become fond of dressing him in orange. Plus, there's always the benefit of being able to spot him in a crowd if/when he runs away from me. Which happens more frequently than I care to think about.
This orange isn't as bright as some other things he has, but as soon as I saw this French terry on etsy, I knew I had to have it. It's really a burnt orange color mixed with a dark brown, in a medium weight, which makes it an ideal layering piece. This pattern is from the 4/2007 issue of Ottobre, and it's known among those who use Ottobre due to its round pocket openings, which are such a cool design feature.
I went with a cotton interlock in a car print for the hood and pocket lining, since the cars have the brown, orange and linden green colors I was using in my SWAP (yes, this is part of that). There are some turquoise ones, too. Plus it matches the striped Hilco ribbing that I got from the Ottobre etsy shop. I didn't have a lot of that so I used a plain dark brown ribbing at the waist, since that piece had to be wider.
As you can see, I had a little bit of trouble lining up the stripes on one of the pocket openings, and the stitching that holds the lining to the body of the sweatshirt is a little bit too close to that opening. I was in a hurry and didn't bother to draw a chalk line before I stitched it. Live and learn. The stitching itself is a new decorative stitch from my machine which is even more like a coverstitch in its appearance than the triple-honeycomb, which used to be my go-to for the RTW look.
Labels:
boy's clothing,
children's clothing,
ottobre
Tuesday, June 19, 2012
Score!
Sometimes fabric shopping can be a crap shoot, especially when you have a tendency to limit yourself to the clearance rack. JoAnn's Red Tag fabrics are almost always polyester nightmares, though in the past I've found amazing treasures, like cyan-blue stretch cotton french terry, floral-print white cotton twill, and black cotton with an amazing multi-colored embroidered border.
A few Saturdays ago a trip to JoAnn's ended up being one of those really good days for finding fabric, and here's what I got:
-Yellow cotton eyelet, dyed with a natural dye:
Maeve picked this out for part of her summer wardrobe. This should be fun to work with.
-Navy and white polka-dot chiffon. Yes, it's polyester, but I've been looking for a polka-dot chiffon to make the Taffy blouse from the Colette Sewing Handbook, and this fits the bill perfectly:
-White cotton stretch woven with red embroidery:
Not sure what this will be, but I'm thinking a blouse of some kind.
-Two different rayon/Spandex knits:
These will be shirts or summer dresses/tunics, I think.
-The pièce de résistance, lightweight stretch cotton sateen in red and white butterfly print on navy ground:
The printing on this fabric is phenomenal ( I know it's not obvious from this blurry photo). Normally in a dark stretch print on white fabric, when the fabric is stretched you can tell that it's printed on white because the white will show. Not this one. I've been planning a Rooibos dress but couldn't find a fabric that grabbed my eye. As soon as I saw this print it was like it shouted "Rooibos!" at me. Now I just have to buy the pattern.
A few Saturdays ago a trip to JoAnn's ended up being one of those really good days for finding fabric, and here's what I got:
-Yellow cotton eyelet, dyed with a natural dye:
Maeve picked this out for part of her summer wardrobe. This should be fun to work with.
-Navy and white polka-dot chiffon. Yes, it's polyester, but I've been looking for a polka-dot chiffon to make the Taffy blouse from the Colette Sewing Handbook, and this fits the bill perfectly:
-White cotton stretch woven with red embroidery:
Not sure what this will be, but I'm thinking a blouse of some kind.
-Two different rayon/Spandex knits:
These will be shirts or summer dresses/tunics, I think.
-The pièce de résistance, lightweight stretch cotton sateen in red and white butterfly print on navy ground:
The printing on this fabric is phenomenal ( I know it's not obvious from this blurry photo). Normally in a dark stretch print on white fabric, when the fabric is stretched you can tell that it's printed on white because the white will show. Not this one. I've been planning a Rooibos dress but couldn't find a fabric that grabbed my eye. As soon as I saw this print it was like it shouted "Rooibos!" at me. Now I just have to buy the pattern.
Saturday, May 19, 2012
Bath Time!
Mr. T's birthday was last month and he wanted a bath robe. I'd been thinking of making him one since the winter 2011 issue of Ottobre had robes in it but hadn't gotten around to it. A birthday present is always a good excuse for making something, and it was a change from the other things I'd been working on.
This pattern calls for the robe to be made up in 2 different fabrics, with the outer layer being a poplin or other similar woven fabric and the inner layer being made of flannel. Flannel is okay if you're looking for a warm robe but doesn't work so well for absorbing water when you get out of the bath. I decided to make the inner layer out of terry cloth so it would be more useful as an after-bath garment. The good thing about this pattern is that the lining isn't made to be sewn right sides together and then turned - the robes are constructed as 2 separate pieces, with the hood also being separate, then putting them together so that the hood is sandwiched between the 2 layers but the wrong sides of the 2 layers are together. Which means that you need to finish the edges with a bias binding or else you're left with raw edges. Of course, this enables you to use a fun contrasting fabric.
I used a cotton woven from JoAnn's in a rocket ship print that Mr. T chose himself. Actually, he carried that darn bolt of fabric all over the store and didn't want to let go of it, until Scott handed me the bolt and took the boy out to the car. The blue cotton terry also came from JoAnn's. The bias binding is red with a white star print, left over from the girls' Delft dresses from 2 years ago. I also used it for the pocket, one side of the belt and as belt loops - the pattern doesn't call for belt loops but without them you'd have to sew the belt on at the back, and I wasn't willing to sew through the terry layer to do that.
Here's a shot of one of the belt loops:
This was remarkably easy to do, although the bias binding is slightly time consuming. This pattern seems to either run small or my son is extremely large for his age (I've been told this on more than one occasion) because this is a size 104 and it fits perfectly. Normally he wears a 98 but I know from experience that European robes always seem to be shorter than the ones you find in the U.S., and I wanted to be sure it would fit, especially since the terry was thicker than the suggested flannel. Also, the hood is shallower than one might expect.
As you can see from the first photo, he's incredibly happy with it and he wears it prior to and immediately after every bath or shower, which is a bit unexpected.
Labels:
boy's clothing,
children's clothing,
ottobre,
sewing for boys
Friday, May 18, 2012
Tutti Frutti
A quick little post about a shirt I made for Gwyn for Christmas. This is the Imke shirt from "Sewing Clothes Kids Love", with the pieced bodice. I actually threw this together after I bought her a pair of pants for a Christmas gift and felt like it needed something to go with it. So I dove into the stash and found these 2 fabrics, both purchased from Fabric Fairy about a year ago. These are really nice weight cotton-lycra knits and I think they're from Flapdoodles, but I could be wrong. The ribbing at the neck is orange and red Campan knit by Hilco that is leftover from a piece that I scored on ebay and used to make the dinosaur shirt for Tallon. I felt like it needed a little contrast and the orange was just the right pop against the aqua background.
Of course, I couldn't just leave it un-embellished - this was for my girl who loves all the extras and likes to go through my stash of iron-ons, patches, ribbon, etc. to pick out the right stuff. I felt like the fruits needed to be somewhere else besides the bodice, so I cut out some of the shapes and fused them to felt, then stitched around them to be on the safe side. Then I cut out the felt and sewed the shapes to the sleeves as though they were patches - 3 on the left sleeve and 1 on the right.
I added some Farbenmix ribbon "Helga and Friends" to the right sleeve before I sewed on the fruit patch; I only used it on one sleeve because I don't always like things to be balanced, design-wise. It makes it more interesting. On the left sleeve I used a yellow and orange flower patch that I had in my stash and, of course, there is the obligatory Farbenmix label on the right sleeve. I love how this turned out and so does Miss G.
Thursday, May 17, 2012
Mr. Green + Jeans
It never fails to amaze me how many pairs of pants Mr. T actually needs. It took me forever to work my way through the SWAP I was doing for him, and I'm still working my way through it. These pants are both made from the same pattern, just in different fabrics.
This pattern is from the Fall 2005 issue of Ottobre, the #15 jeans/velveteen pants, in size 98. Let me say that this style is an extremely wide leg, so if you don't like that style of pant, this is probably not one you'll like. I like the knee patches and unique pockets on it, as well as the fact that it has an elastic waist, which makes them easy for the boy, since he doesn't have to struggle with a zipper when he has to use the potty. Funnily enough, the wide leg comes in handy for that, too, since he does better without pants around his ankles and I find that with these pants I can slip one leg out without having to remove a shoe. So much better in a public bathroom, right?
Anyway, these are made up in a kiwi-green brush denim that is an unusual color but it works really well with a lot of the things I've made in the SWAP. There is dark brown topstitching on the pockets and seams, including the knee patches. On this pair I chose to use a different fabric for the little "treasure pocket" on the left knee patch; I used tan-grey denim left over from the knight jeans that he outgrew. The cool thing with the pockets is that you only need to finish one side and the bottom, as the outer side is inserted into the side seam of the pants.
The second pair from this pattern was made from blue denim with brown pin-stripes. The magazine shows a denim version of these pants which uses the wrong side of the denim for the knee patches as a contrast. I didn't really like the wrong side of the denim, but I decided to jazz things up by alternating the direction of the stripes on the knee patches, as well as on the back pocket and hip areas. I like things colorful, too, so I decided to use a red thread for the topstitching. I love the way this turned out.
This is an easy pattern to put together, although the stitching on the pockets and the knee patches is time consuming. You could just as easily eliminate the knee patches and the decorative stitching on the pockets though, and just have a basic wide-legged pant. I did have one problem with the instructions and that was with the waistband. I just didn't get it. I made the green version first and tried to follow the instructions but it just didn't work for me. I thought maybe I was tired and I looked at them again in the morning and no, still not working out. I decided to just serge the edge with the seam allowance, then attach the waistband, so that the served edge would be on the inside. This way you end up seeing the edge but it's not unfinished. The instructions call for the inside edge to be turned under but I seemed to not have enough fabric left. Perhaps my elastic was too wide, owing to the fact that it doesn't come in metric here in the U.S. That would explain it. In any event, I love the way these turned out and they look adorable on him.
| "Treasure pocket" made from contrasting color. |
| Back view |
This is an easy pattern to put together, although the stitching on the pockets and the knee patches is time consuming. You could just as easily eliminate the knee patches and the decorative stitching on the pockets though, and just have a basic wide-legged pant. I did have one problem with the instructions and that was with the waistband. I just didn't get it. I made the green version first and tried to follow the instructions but it just didn't work for me. I thought maybe I was tired and I looked at them again in the morning and no, still not working out. I decided to just serge the edge with the seam allowance, then attach the waistband, so that the served edge would be on the inside. This way you end up seeing the edge but it's not unfinished. The instructions call for the inside edge to be turned under but I seemed to not have enough fabric left. Perhaps my elastic was too wide, owing to the fact that it doesn't come in metric here in the U.S. That would explain it. In any event, I love the way these turned out and they look adorable on him.
Labels:
boy's clothing,
children's clothing,
ottobre
Wednesday, May 16, 2012
T-Shirts for Mr. T
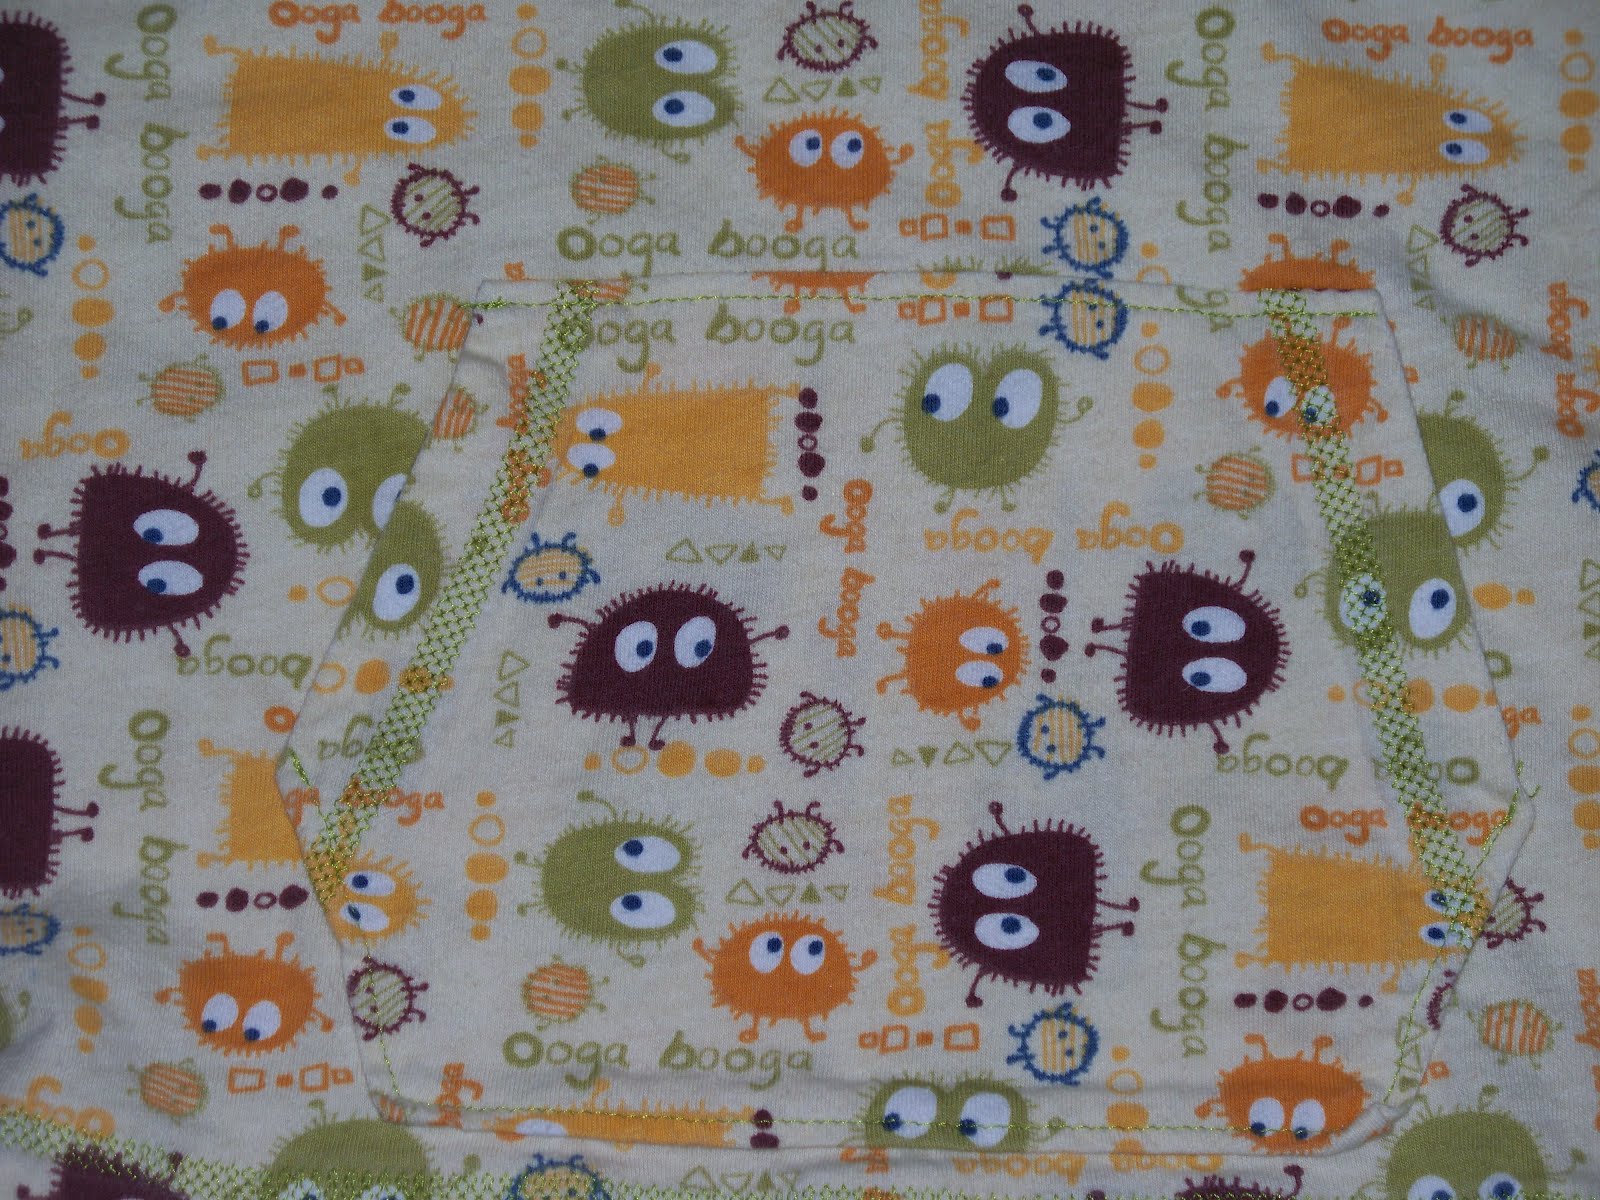
I mentioned before that I'd traced some Ottobre patterns and by the time I got around to cutting them out, he'd grown enough that they wouldn't fit for long. I figured this out by cutting out the shirt you see above. This is the #12 shirt from the 4/2010 issue. I'd traced and cut it out in a 92 and sewed it up, only to discover that T. had grown enough for it to be rather snug on him. The shirt is supposed to look like two in one, with the hood in a contrasting fabric, so I dug up some brown and red Campan knit from a previous shirt I'd made him and used that for the hood. I'd already used olive green ribbing because it goes so well with the Ooga print but it didn't look good with the brown and red, so I went with the maroon ribbing on the hood. It definitely gives the impression of two different shirts, although it's obvious from the fit that it's just one.
Here you can see the front pocket a bit better, although it still blends into the body of the shirt. I used the triple-honeycomb stitch on my machine to imitate a RTW coverstitch. Anyway, it works well and I used the same stitch when I made the drawstrings for the sweatpants in the previous post.
Having realized that the boy needed a 98, I cut out new sizes for him in 2 other shirts. The first is the Hippotamus Hoppulainen shirt from the 6/2010 issue. I like this shirt because I think it lends itself to a mix of fabrics while still looking sporty and boyish. For this I used the Michael Miller dinosaur interlock and a piece of orange and red Campan knit. That Michael Miller stuff shrinks like nobody's business and it's super soft! Maybe that's why it shrinks so? Anyway, the ribbing is a beautiful turquoise from JoAnn's. I wish it were slightly more green in color but I like the contrast of the turquoise with the orange.
This piece of Campan was really small - not even a half meter, so I had to really work to fit all the pieces when I laid it out. As you can see, I used the stripe for the front, back and the stripes on the sleeves. This shirt goes really well with the brown sweatpants in the previous post.
Last shirt in the list is the Pistachio-Chocolate reversible hoodie from the 4/2009 issue. I wanted something to match the blue sweatpants and dug out a printed stripe knit that I'd used for outfits for the girls about 4 years ago. I'd used it for an accent to a print, but it seemed like a good boy fabric. Then I dug around in my stash and found the world's softest navy cotton knit this side of paradise - totally serious about this. I want to curl up in it. Anyway, add to that some olive green interlock and some maroon ribbing and you get this:
I decided that I wanted the pocket and hood on the stripe side to match - hence the decision to do both in green. I used that tripe-honeycomb stitch again for the pocket hems and as topstitching on the sleeve hems. The navy side would have been too plain with a navy hood, hence the stripe. T. loves this shirt and wears it a lot with either pair of the navy "soft pants". It's his "cozy" outfit. I haven't gotten him to wear it with the navy side out - I suspect he likes the way it feels against his skin too much. But it would look fantastic on the navy side with the sleeves rolled to expose the stripe on the other side. This shirt is pretty heavy and he gets hot pretty easily, so I don't have him wear a shirt under it, though you could if you used thinner knits, as it's cut quite roomy. My only problem with this shirt is that I forgot how much the stripe fades, since it's not yarn-dyed but printed. Ugh. But he doesn't seem to mind and it gives it a sort of worn-in look that is generally achieved in RTW with acid washes and the like.
Boy oh boy!
I seem to have been remiss in blogging the many things I made for my son this fall/winter. So. Much. Stuff. So let's jump in.
Starting off with the pants:
Next up, sweat pants or "soft pants", as my son likes to call them. As in,"Mommy, you make me soft pants???" My husband is afraid T. will grow up to wear track suits like the guys from the Sopranos, but right now he's all about being cozy and I'm all about the pants being easy to get on and off.
These are made from the same pattern, City Mouse sweatpants from the 4/2011 issue of Ottobre. I had traced a 92 but realized that he'd grown and wasn't going to be able to wear them very long, so I decided to trace up a size. This was a bit awkward, since the pattern only went up to a 92. I used a method from Teri's blog, Mermaids and it worked really well. I plan to use this for other items that I need to size up 1 size. Anyway, the brown pants are brown stretch French terry from Sewzanne's, with striped ribbing from the Ottobre shop on etsy. A very good deal, since you buy a meter but then can divide it up and get different colors. I got orange and brown, as well as orange and linden green and orange and light blue. The second pair is from a really heavy-weight non-stretch cotton sweatshirt knit that I got at JoAnn's. I also got the maroon ribbing there. The drawstrings for both pairs is cotton rib knit that I had in my stash. The third pair (pictured at the top) is the same navy but I had to piece the legs in order to have enough fabric. The green ribbing is also from JoAnn's.
Next up, shirts but I'll do that in a separate post.
Labels:
boy's clothing,
Farbenmix,
kids clothing,
ottobre,
sewing for boys
Subscribe to:
Posts (Atom)