Wednesday, March 21, 2018

Irish Dance Dress, Part One: Color and Inspiration

Back in October 2014, Maeve placed 1st in her Beginner 2 Reel and 2nd in her Beginner 2 Slip Jig, meaning that she could move up to the Novice level in those dances and that I could start planning out her Novice or 'solo' dress. If you're not familiar with Irish Dance, most schools require dancers to wear a school outfit, or a black skirt and white blouse at the lower levels. At a certain point as she progresses, a dancer may be allowed to wear a 'solo' dress - something that is usually made specifically for the dancer and which is an original design. It's bad form to copy others' dresses, though it's understood that there are only so many original ideas under the sun and that there are only so many color combinations that can be made. Styles can vary, particularly with the skirt, and dresses are often highly jeweled with Swarovski crystals. A non-jeweled new dress would be considered okay at the Novice level but probably not at a higher level. Such a dress would run in the neighborhood of $500 at a minimum. I saw a name-brand used dress at a feis in January that was priced at $500. Most newer dresses with a small amount of crystals will run you around $1000, off the rack. Custom-made dresses will cost considerably more, with $1,200 to $1,500 not considered unusual.

Maeve's ideal dress, as I mentioned in a previous post, was a lovely $1,200 dress made by Prime Dress Designs - cobalt blue velvet and satin with an orange-red embroidery. She loves this dress, so I decided to use it as an inspiration and jumping-off point.

Inspiration dress by Prime Dress Designs


The first thing was to find the correct color. I managed to find a beautiful blue dull satin at Mood Fabrics at quite a reasonable price. Then I started a long and exhausting search for the proper color blue velvet. This took a while but I was able to find some on the Fabric Depot website and purchased it while in Portland at a Feis in January. The orange was something I came across by accident  - a stretch satin in a color called "Neon Tangerine" from Fabric.com. The embroidery thread is Sulky in Orange Flame. For this dress I also needed an underlining and a lining; the underlining is a pale blue poly-cotton and the lining is red-orange poly-cotton broadcloth that I got on sale for $1.99. Both are from JoAnn's. For sparkle I also got some Swarovski crystals in cobalt blue and in fire opal (a red-orange blend). You'll see those at a later stage.

The thing that was hardest was figuring out what kind of motifs I wanted to use. Maeve prefers the more traditional-style dresses with Celtic knot work, and I was able to find 2 that we particularly liked in a book that we have - they are adaptations of actual knots from museum pieces. The chest piece is an adaptation of an interlaced pattern from the Lindisfarne Gospels, which date from the late 7th century. You can see that in the British Library in London, England. The original design was more complex and I wasn't sure that I'd be able to execute it well, as it's my first time doing this type of thing. Scott pointed out to me that instead of the double line I could simply make it into 1 thicker line and it still works. This motif will be an appliqué of the orange satin on the bodice, which will be a combination of the blue velvet and blue satin.

Bodice appliqué design


The second motif will appear in small size on the sleeves and in a larger size as the shaped cape. This is an Anglo-Saxon design, taken from a bronze-gilt bookmount that dates from the 8th or 9th century. The original piece can be found in the National Museum of Ireland in Dublin. I have chosen to use this motif in an inverted orientation in order to emphasize the bell-like shape of the sleeve, but also to give it the appropriate weight so that it doesn't look top-heavy.

Sleeve embroidery design.

I know I've talked a great deal about the bodice and its embellishment, but that's because I'm waiting for the pattern for the skirt support structure. The dress pattern is from Feis Dress and I'm using the princess seamed bodice. The skirt will be a skater skirt but it will still need to have support. Luckily for me I came upon a wonderful Yahoo group of people who make Irish dance dresses and everyone recommends the 'skirt frame' pattern that one of the members has created. I've ordered it and am now just waiting for it to come from Ireland. Meanwhile, I'll try to document the steps of making this dress as I go.

Tuesday, March 20, 2018

In-VEST-ed

Apparently I fell off the face of the blogosphere because I haven't posted anything in about 4 years - which is also about how old my youngest is, so there's clearly a correlation. I'll try to catch up on older things I've made but in the meantime, I want to talk about my latest project, which actually paid me money.

So I've mentioned that my oldest does Irish dance. We've moved since I last posted, and her new dance school is SO much better than the old one. In fact, the old one no longer has a location where we used to live. We switched regions and my daughter has moved into Prizewinner in her Reel and Slip Jig and is hoping to move out of Novice for her Treble Jig and Hornpipe. Last December she competed at the Southern Region Oireachtas in the Traditional Set competition; this December she'll be doing solo competition, and I'm in the process of making a new dress. I'll try to document this as I go. Having already made her a solo dress, I learned a lot and sometimes I get asked my opinion on fit for dresses, as well as for the boys' equivalent - the vest/waistcoat. A boy in our new school wanted a vest and tried one on - my opinion was that it didn't fit and there wasn't a lot of room for him to grow  - important, because his genetics are likely to make him a tall drink of water, and at 13 he was liable to have a growth spurt at any moment. His mom didn't buy the vest but a few weeks later I got a call that she was interested in having me make one for him. I accepted it.

We met and I got his measurements, plus we talked about design and color. He wanted a wolf design but our instructor nixed the idea of a realistic wolf. She encouraged him to look at Celtic designs but he didn't find a Celtic wolf he liked. He focused on the design that was on the vest he'd tried on - one that had two dragons. I explained that I couldn't copy the original but would work a design that was similar.

The original design:


My first attempt had the tails curving toward the back and then coming up through the center, in a "W" shape. He didn't like the tails coming up - he wanted them to go down. I was bummed because I liked the sinuousness of the shape of the body - very Loch Ness Monster.


My next attempt was different and was unsuccessful - I didn't even show it to my clients. I started over and went in a slightly different direction, which ended up in the final design:


I feel that this has a good Viking feel to it, almost like the carved prows of Viking ships.

Once we got the design approved I had to find someone to digitize it for my machine. Now, I only have a 5"x7" embroidery field on my machine. That means that any design that is bigger than that has to be split. I took the design to a local guy who runs the sewing machine sales and repair shop because I was told that he does digitizing, too. They sell a digitizing program for some ridiculous amount and he teaches how to use it. Well, I can't afford that program and it doesn't run native on a Mac and my Windows computer is ancient and slow - not fit for the task, honestly. Anyway, I asked how much it will cost to digitize and told him my machine size and he seemed reluctant to do it, saying that he could do it but not split it and that I would be better off having someone else embroider it for me. Of course, that costs money and I honestly didn't quote enough to do that. And anyway, I wanted to do it myself, if only for the experience. To top it off, he offered the solution of buying some pre-made design that was bigger than my hoop and then having someone embroider it for me.

Um, no.


So I contacted an amazing woman named Ann, who is a member of the Irish Dance Dressmaking group that I belong to and who has a business digitizing. She was very excited and really liked the design. She digitized it and then we worked out the kinks. It was, to be honest, very difficult (okay, so the local guy was sort of right). The problem was that she had to find the right spots to split the design and some of it was a continuous line, which makes splitting more difficult. The other part was the number of times I had to re-hoop it, since the design could only be done in small pieces at a time with my machine. We thought that maybe we'd be able to use my 5"x12" hoop, but we couldn't get it to line up - literally .5 mm difference! What a killer. In the end, we decided to just use the 5"x7"  hoop and the front of the vest had 9 splits and the back had 11. I now have calluses on my right hand from tightening the hoop. The finished product is amazing, though.

Vest front
Vest back

The dragon design is done in a non-metallic silver polyester thread by Floriani and the turquoise, blue, and green colors are rayon Sulky thread, embroidered on black microvelvet. And, of course, no Irish dance garment is complete without crystals. For this project I used Swarovski crystals that I purchased from Dreamtime Creations. The larger stones are size 30 and are the Blue Zircon Shimmer color. In the green sections I used size 16 stones in the color Fern Green Glacier Blue. The darker blue crystals on top are Capri Blue and on bottom are Bermuda Blue, both size 16. The turquoise sections are a mix - some are Blue Zircon Shimmer and some are Blue Zircon Glacier Blue, also both size 16. There are also clear crystals in sizes 16 and 20.


That's about it for now. I'm going to try and get together posts about the (first) solo dress I did for Maeve and all the work that went into that before I start any on the process about the new dress. And of course there are many other sewing projects that happened in the past 4 years which I'll attempt to address. I may end up consolidating a lot of them.

Friday, June 13, 2014

Sewing Dreams

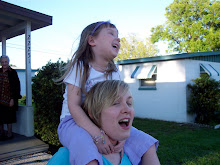
Me and Maeve at an Irish dance competition - Aonghus is in the sling I made.
It's been a long, long while since I've been in the sewing room. I've got a million things planned but haven't been able to get in there because... well, because the baby is a lovely little boy who wants to be awake - all. the. time. He pretty much doesn't do more than a small cat nap or 2 during the day, although he is known to fall asleep in the infant seat while I drive, which really does me no good. It means that there are things that I cannot do when he's awake, since he really needs to be upright due to his reflux. So I usually have him in the sling. Actually, now that I think about it, I did stumble into the sewing room about 2 weeks ago and I made a new sling, which he loves. And by loves I mean that he squeals and makes happy baby noises when he sees me put it on my shoulder. I bought the aluminum rings from Sling Rings, and used the instructions at the Maya Wrap website. It was all pretty straightforward: I ordered a selection of rings because I didn't know what size would be best and then used the largest size, bought 2.5 yards each of 2 coordinating fabrics because I wanted something that was reversible and because I didn't like any of the heavier fabrics that didn't have a wrong side. I washed the fabrics, then trimmed them up, placed them wrong sides together and serged the sides, turned them toward what I wanted to be the inside, and stitched them. Next I serged the ends and then simply followed the rest of the instructions on the Maya Wrap site. I used the entire width of the 45"-wide fabric because I wanted to be sure that this would grow with baby boy. In fact, the only reason I made it was because I was so frustrated with trying to adjust the old one I'd had for ages; it had padded rails and they just didn't allow for fine-tuning and made me feel as though Aonghus wasn't secure in the sling. The length means that even my husband could wear him, and that's a good thing, plus the longer tail means that I've got an impromptu nursing cover if I need one. The fabric is Kaffe Fasset and I think it's quite a lovely combo.

Not sure if you can see the lining, but it's a mustard-yellow with turquoise dots.

Meanwhile, my oldest has moved up in Irish dance so that she is at Beginner 2 level in all her dances. A few competitions ago, she came in 4th in her reel and 3rd in her treble jig, putting her quite close to moving up to the next level in those dances. Then last weekend she placed 4th in Slip Jig, which is great even though she couldn't move up. That's really important to her, since next level is the Novice level, and while it may sound as though it has absolutely nothing to do with sewing, it actually does. At the Novice level dancers are allowed to wear a solo dress and if you know anything about Irish dance at all, you'll know it's a big deal. If not, Google the term feis dress. You can also check out my Irish dance board on Pinterest. Go ahead, I'll wait.

Back already, are you? Do you see what I mean? Gorgeous dresses. Lots of embroidery. In some instances, lots of fancy fabrics and trims, lots of crystals. Maeve isn't really into the dresses that are ultra sequined or heavy with crystals - it's not her style. But she loves the traditional Celtic knot work motifs and really can't wait to be allowed to wear such a creation. But the cost of a dress is highly prohibitive. A good simple dress can cost upwards of $400 or $500 dollars, used! If you're lucky you can find one somewhere for less, but it's been worn quite a bit and most of these dresses cannot be cleaned in the washer or by a dry-cleaner. And a used dress is less likely to be what you want and every girl wants THE dress. So I've become obsessed with the idea of making a solo dress.

Yes, I know it's probably biting off way more than I can chew but honestly I know I can give Maeve what she wants and liking the dress you wear means that you feel good when you're competing. And that means you're more likely to smile and more likely to do well. Judges like smiles. Yes, in the end it will probably end up costing the same or close to it as if I had bought a used one. But at least it will be new. And I want her to have something that no one else has.

Maeve in her school dance outfit. This is 2 pieces - a black net skirt with gold sequin trim and a black top with Celtic knot embroidered appliqués (purchased patches) and a lace collar sewn on.

The other part of this is that I desperately want to stretch myself in my sewing. I already have the embroidery machine, so that's in my favor. The local woman who does dresses does an okay job but I feel like her craftsmanship is slightly sloppy. She makes the school dance dresses and the one that Maeve has is not exactly up to my standards on the interior. Personally, I wouldn't let something like that out of my workroom but I'm a perfectionist. And she doesn't do embroidery, she just uses fancy fabrics. Since the fabrics won't be as glitzy, the work on the appliqués and embroidery would really stand out on the one I plan to do. Patterns for Irish dance dresses are available from Irish Threads and from Feis Dress and I plan to buy one of each, so that I can do a muslin of both and then determine what direction I want to go in. It will be a true labor of love, think. And I'm so excited to do it. I'll definitely end up doing many blog posts about it, just because I want to document the process. But it will probably be interesting to anyone reading this who sews. And the dress she loves best? A gorgeous dress by the company Prime Dress Designs. Just to prove that I need to make this, rather than buy one? That dress cost $1500 new, and it's not even got a ton of crystals or lots of fancy fabrics. Granted, the one I make won't be exactly like that one; it's the color combo and the fabrics that really make the dress, and as long as I can get the right embroidery and appliqué shapes it should come pretty close. *fingers crossed* In the meantime, I haven't bought the patterns and won't until she makes Novice in at least 1 dance. Then I'll buy them and start with the muslin, but I won't buy the fabric for the actual dress until she's made Novice in 1 or 2 more dances, since she won't be able to wear it if she's not in Novice level. This seems to be motivating her to practice more, so I'm hoping that she'll continue to improve and place in her Beginner 2 dances.

Monday, May 12, 2014

When You End Up with Lemons....

... you're supposed to make lemonade, right? Well, this time I didn't have lemons but I did have a dud. Sometimes it's hard to admit it, especially when you have a vision of what you're trying to create and it's something that you're really excited about. Other times, it's easy to say, "This just doesn't work." *** Note: this was originally written last summer but I never got around to posting it***So when I discovered that many of my below-the-belly maternity shorts were not staying up well, I felt like I should make a few things to replace them for summer wear. Now, bear in mind that this was the last baby I was going to have and I didn't really want to invest much in the clothing, which means that I was sewing from my stash. And since my stash is full of fabrics that I love, I didn't want to "waste" them on maternity clothing that I won't wear again. I scoured my patterns and Ottobre Woman back issues to find something that could be transitional - maternity or nursing wear. Something that would look okay with a belly but just as okay without.

The first thing that I landed on was the 2/2008 issue of Ottobre Woman. In it there are a few maternity patterns, like the skirt pattern I made previously. But it also has this cute maxi-dress with a wrap-front top. Wrap or crossover bodices don't always work well for me and the (ahem) ladies, since there's almost always a gap issue that happens, or it's too low-cut. I'm working on perfecting an FBA for a wrap-front top/bodice, but I'm not quite there yet, which is why the Ottobre tankini I made went from being a wrap-front to having a center front seam. Still, I'm not one to give up on a style when it's something that I truly like. This dress calls for voile or lawn - something light and airy, especially for the skirt portion. However, the voile I had been hoarding in my stash was not a big enough piece for the entire dress - a bummer. But then I had the bright idea of doing the bodice in a cotton-lycra knit and only the skirt in the voile, as I had plenty for the large skirt.

I worked really hard on the FBA and finally ended up with something that I thought was reasonably well-fitting.The skirt came together quickly and only required a few adjustments. Separately, they looked pretty darn good. But once I sewed them together, my opinion changed.

The overall effect was pretty boxy and unattractive. I lost all shape in it, and as a short woman who is right on the line between regular and plus-sized and was pregnant to boot, that's just not a good thing. I'm not sure how it happened, since I took in the side seams of the bodice before I attached the skirt. I think that overall it's just too big, which is weird, since I feel like I went by my measurements and cut the bodice a size smaller than I normally would have. This has happened a couple of times that I've worked with Ottobre patterns and I wonder if I'm just choosing the wrong size? Although to be honest, I've measured myself and gone with the measurements, so maybe my body is just shaped differently than the one they have in mind. At any rate, I decided that this just wasn't the style for me - at least not while I was still pregnant. I wanted to use the voile, though, so I turned it into a maternity skirt.


Yep, it's the same pattern as the khaki and navy floral linen skirt I made previously. The difference here is that I had to line the skirt with something because the voile was too sheer on its own. I ended up using some cheap, lightweight bleached muslin because JoAnn's had no batiste or plain white voile. I know - bizarre, right? When I asked the lady for batiste, she said,"You mean batik". I told her no, I meant batiste, and I even spelled it for her and then went on to describe it and its uses. She had an extremely confused look on her face and then asked another employee if they had it. They didn't. Same thing with the word 'voile', although her confusion was due to the fact that she, like most Americans, mispronounces it to rhyme with foil. The correct way to say it, of course, is "vwahl". It's a French word. Anyway, I did a rolled hem for both the lining piece and the voile and then simply basted them together at the waist and treated them as one when I applied the waistband. This time I used a super soft red rayon-lycra knit, figuring that I was probably going to wear this with a red shirt, and even if the shirt crept up a bit, it wouldn't look so bad if the waistband is the same color. The only real changes I made to the skirt were to cut it slightly bigger than the linen one and I did that by simply placing the pieces a bit away from the fold when cutting. The difference is really negligible. I got several comments on it when I wore it, so that's good, and I like it enough that I'm going to wear it this summer, even though I'm no longer pregnant.

This skirt is so comfy I wore it a lot. This is me about  12 hours before I gave birth.

Skirting the Issue (aka: How to Get Through 1 Last Pregnancy without Buying More Maternity Clothes)

***NOTE: this was written last year - I just never got around to posting it because, well, babies keep you busy.***


This is the last pregnancy I'm going to have and I don't want to buy any more maternity clothing. At the same time, I don't really have a ton of summertime maternity clothing and this baby isn't due until the end of August and I can't spend summer in jeans and corduroy pants, of which I have quite a bit. I seem to have enough shirts to get me through summer without getting new ones, although I have replaced one or two of the older ones - most of my maternity clothing dates back to 2005, so it's roughly 8 years old and some items are a bit, well, worn out. I ended up buying 2 tank tops and a striped t-shirt at Old Navy, simply because I had some 'bonus bucks' I had to use before they expired, and because I could get 30% off my purchase, which made it more than reasonable. I'll sell them after this pregnancy, along with the rest of my maternity wardrobe that isn't too worn or old to be given away.


Anyway, it's the bottoms I'm in need of and I'm trying to get away from shorts. I ended up buying a pair of tan poplin cropped pants just because it suddenly got warmer than usual, but I'd rather have some skirts or something. It can get humid here and we don't have air conditioning - I want something easy and breezy for the last trimester of this pregnancy. Ottobre to the rescue! In the Spring/Summer 2008 issue of Ottobre Woman, there were a couple of maternity items and one was a cute two-layer skirt with a knit waistband. I had some linen that I bought a while back which I'd decided against using for the project I'd had in mind but which was kind of perfect for this pattern - a sort of khaki ground with navy blue flowers in a very large print. I decided against making this a 2-layer skirt because I liked the print and I only cut the longer, bottom layer. Add a waistband in navy ribbing and it was a quick and easy skirt to make. It's very cute with a navy tank top but will also look cute with white or red on top, and it's not too dressy so I can wear it with flats or Birkenstocks but I can also dress it up a little with my espadrilles. I cut this in a size 46 but I think a 48 might have fit better, since the linen has no stretch. I plan to make this from a knit, too but I think I'll keep the size 46 for the knit.


The other skirt I made is the Megan Nielsen pencil skirt pattern, which is super fast and easy to put together. You could totally do this in an hour if no one was there to bother you. The shape is really simple and, honestly, I'm embarrassed to have spent $18 on a pattern with 2 pieces when it's something that I probably could have drafted for myself. I didn't want to waste the time doing it, though, so I can't complain and I'll probably sell it later on if I don't know anyone who wants it.


 I'm not really one for the super skin-tight maternity clothes; I do prefer a more fitted knit top when I'm pregnant, simply because I'm short and if I don't try to define my figure in some way I end up looking kind of dumpy and lord knows nobody wants to look dumpy when they're pregnant. Also, I'm not usually fond of fitted clothing that emphasizes my derrière. But I have these excellent shoes that I bought for my birthday and their shape and style deserved something a little bit sexier than the average maternity outfit in my wardrobe. I made this from a bamboo stretch French terry in black, which is thinner than cotton French terry but not so thin that I'd be afraid of having a panty line or any unsightly (ahem) lumps. The whole point of this skirt is to show off the bump, so the waistband sits directly under the bra band. This gives you a smoother look under your outfit, I think, but then it makes it harder to wear a thinner, lighter-colored shirt if it comes down over your belly if the skirt is a dark color. Anyway, I decided to wear a red button-down maternity shirt with it, but since it's an older shirt (from my first baby, 13 years ago!) it doesn't have a very modern shape and is more tent-like. Because of the high waist on the skirt, I was able to tie the shirttails in a knot above the bump, which was kind of cute. In all, it was a pretty successful garment and I had a nice date with the husband at a local Mexican restaurant.

Pirate of the Playground


A while back I posted about the "Pirate Girl" outfit I made for Miss G - she's all about being adventurous and brave and pirates pretty much fit the bill for that. And because Mr. T is so close in age to her, he usually wants to do whatever she does. So when I bought the pirate girl iron-on from Bunte Fabrics before it closed, I also bought a pirate boy and promised T that he could have a "Pirate Boy" outfit. I made the pants in August, not long before Aonghus was born. The shirt got finished in September and I figured I ought to blog them now before I forget to document them!

First up, the pants. I found this super cute medium-weight striped twill at JoAnn's a couple of years ago. At the time I'd thought of doing some cropped summer overalls for T. but I didn't get around to it. Then this year when I was planning his summer SWAP, I decided to make these part of it - sort of. They didn't really go with the general color scheme but he always has a blue or red t-shirt of some kind, so they'd fit into his wardrobe without necessarily needing the pirate shirt. The pants are from Ottobre 2/2005 and they are #23. I chose this pattern because the magazine actually showed the pants made up in a stripe fabric and it immediately reminded me of the twill that I already had. I wasn't sure about adding the knee patches, but decided to do it and used some dark denim from my stash. I used it for the faux pocket-flaps on the back, too. The pocket lining is a navy cotton with white stars. I used red topstitching thread for these pants so that it would pop against the navy knee patches. And although the pattern calls for rivets at the knees like commercially-made jeans have, I don't know where to find those locally or online, so I just did bar tacks at the corners.


The length of the pants makes them a perfect transition garment, for those early fall days when it starts out cooler but warms up enough by afternoon for the kids to want shorts. The elastic waist and faux-fly make them easy to put on and take off, which is nice when you're in a hurry to get into your bathing suit! This pattern is easy to make up but has enough details to make it more than just basic shorts. I'm definitely using it again in the summer.


The pirate boy shirt is Imke from the SCKL book. This version uses the straight-cut sleeve and the rounded, sporty hood. Gwyneth's has the pointy hood with the tassel. I used a red and white stripe cotton-lycra knit for the hood and lower sleeves and a medium weight navy cotton solid. It may have some lycra in it but I got it as a remnant so I don't recall. I didn't have enough of the stripe to do 2-layer sleeves, so these are single-layer sleeves made to look like 2-layer ones.
 On the right sleeve we have the skull and crossbones iron-on and pirate kid ribbon from Banberry Place; the left sleeve features a double ribbon trim, with blue and red star ribbon from Farbenmix on top of a navy grosgrain ribbon with red pick-stitching. Embellished, but not too girly.

Sleeve detail - right.
Sleeve detail - left.
As I said before, I made this shirt because I had the iron-on pirate boy. It looked great the first time T. wore the shirt, but then it lost a foot! Apparently the glue wasn't fully activated. Anyway, here's the look of the shirt-front, minus a pirate foot:

I'm trying to figure out a way to add a new foot that doesn't look too weird, so I'll post an update if/when I get to that.

Thursday, November 21, 2013

Tales from the Sewing Crypt


It's Halloween-time again and that means that my sewing machine is going full-steam ahead. This year Maeve decided to wear her costume from last year, so I don't have to try to top that one! However, this year I have to make a costume for the baby (yes, I'm masochistic like that), as well as Miss G., T-bird and myself. Luckily, they should be fairly easy to do, with the exception of Miss G's.

Gwyneth decided that she wants to dress as Merida from the movie "Brave" this year. I've done several Disney princesses - Maeve was Cinderella and Snow White, as well as a sort-of Sleeping Beauty (the dress was pink, anyway). Anyway, I was kind of hoping that Gwyneth would opt for the Snow White costume this year and give me a break on costume sewing. Of course not. Merida is her favorite princess and I have to agree with her on that, since Merida is the one princess who doesn't end up falling for the prince at the end, and is actually the one who does the 'saving'. Tallon decided that if she was going to be Merida, he wanted to be one of her brothers the triplets.

At first I was hesitant but then I decided that this was a good idea. Normally I'm a stickler for authenticity when it comes to iconic costumes like the Disney ones, but I'm taking a different view this time. Here's why: there is plaid involved and a kilt. I could make a kilt, but it would be time-consuming and I wouldn't be able to find a plaid that was the same as the plaid in the movie. Since that's the case, I decided to go an easier route, unusual as that may be for me. Tallon already owns a kilt in our clan tartan and Gwyneth, Maeve and I have sashes in the same tartan. How easy is it to just have him wear our tartan? Then all I have to do is make a green shirt to go with it and I'll have to do very little sewing. I like this idea.

The Merida dress, however, is more difficult. We decided on this project before McCall's put out their Halloween patterns and apparently they have a 'licensed' Merida dress pattern. I personally don't like it that much and since it wasn't available, I scoured online pattern sources until I found a pattern that most closely resembled the dress from the movie - McCall's 5207, which is currently out of print. I got my copy on ebay and I'm sure there are several copies out there. The thing I like about this pattern is that it runs up into the larger girl sizes (12, 14) so I could make her another dress from this same pattern when she's older. To keep that option open, I traced the pattern pieces. I will be altering the sleeve construction to make it do what I want (not surprising) and I'm adding embroidery to the neckline and hem. Yes, I know that in the film Merida's dress is plain, but I'm not sticking to the authentic version, remember? Besides, I need to justify having the embroidery machine and this is a good reason. That and the dress will look that much better when it's finished. Lastly, I'm going to do hand-made eyelets on the back (it laces up!), rather than apply the metal eyelets which never stay properly, anyway. And it's a good excuse to practice making eyelets by hand.

Merida wig before haircut.
Accessory-wise, Gwyneth already has a Merida wig that she got for her birthday last year and I ordered a bow-and-arrow from the Disney store so it will look authentic. Mr. T is blonde and insisted on having a wig too, so I bought a cheap Merida wig from Party City and I've cut it down to look like a boy.


Here you can see the wig in the middle of the trimming process, after I'd cut off the long pieces at the back and on the sides. I was concerned that I would cut too much off and then I would have wasted $15 on the wig, so I went slow and only cut a bit at a time. The triplets in Brave are drawn with curly reddish hair that's short on the sides but the front bangs are puffy and stand up quite a bit, so I didn't want to cut too much from the front. The trick was getting it to not look too much like Merida with short hair. Here is the end result, from front, back and side:


 As you can see, I tried to make the back look as natural as possible, cutting it short but leaving enough that you can't see the wig base. I also needed it to look a little messy, otherwise the curls would look too girly. I think I managed to get a good balance. This wig was in the section for littler girls and I think it's a tad small for his head, but that's okay because that way the curls aren't too overwhelming. Overall it looks pretty close to the triplets' hair in the movie, but I think it's  best judged with the entire costume, and that will come next time.

Tuesday, July 30, 2013

Pajama Time!


It seems like my kids always run out of things that fit in stages that go by types of garment. Around Christmastime I realized that Mr. T was in desperate need of new pajamas. His old ones were all too small and I was reluctant to go out and buy new ones, given the vast stash of fabric in my storage room. So I got out a pile of knits and had him choose 3 prints to work with, for 3 new pairs of pajamas. He ended up choosing a print with dogs (some of which are blue) on yellow, a jungle print in green, aqua and brown, and - his absolute favorite - a "breakfast" print of eggs, bacon and toast. Breakfast-themed prints seem to be his thing; his favorite RTW t-shirt is a face whose eyes are fried eggs and whose mouth is a strip of bacon. Go figure.

I used my go-to pj pattern, the "Stripey Legs" pants and "Night Owl" shirt  (nos. 34 and 35) from the Winter 2009 issue of Ottobre. This issue is one of my favorites and I've made quite a few things from it by now. Since I wasn't sure if I'd have enough of the prints to do both the shirt and pants for each set, I decided to throw in a complementary stripe for each one: two-tones of blue rib knit for the dogs, green with white stripe interlock for the jungle print, and yellow and orange rib knit for the breakfast print. I used brown ribbing for the cuffs of the jungle and breakfast prints, and a cobalt blue ribbing for the dog print.

Crazy before bedtime.
I've made this pattern a couple of times and used a few different techniques to sew it together. The directions call for you to lap the seams and then sew them with "a flat lock stitch", by which I assume they mean a coverstitch. I don't have a serger that does a coverstitch so I've used the honeycomb stitch on my regular machine in the past and that's one they recommend in lieu of the coverstitch. I've also constructed them using regular seams and topstitching them. This time I decided to try a flatlock stitch on my serger, which gives a smooth seam on the inside and has the seam allowances on the outside. It worked out okay but I don't think I'd do it again, simply because the exterior seam allowances are a little bulkier than I'd like.

Jungle Jammies!

The other issue I came across this time is that, because I used the blue striped rib knit for the body of the shirt, the neckline was slightly bigger than I would have liked. Darn that rib knit! I should have stabilized the necklines before I sewed the binding on. It's not a glaring fit issue and it makes it easier for Mr. T to get the shirt on over his big head, but still.

All in all, a very successful week of sewing these. If only I could get in the sewing room more regularly! And if only I could remember to post about them in a more timely fashion! At least I was able to do them in a sort-of assembly line style. Using the brown for 2 pairs meant I didn't have to change thread for each set and that's always a time-saver.

Now he needs more pants. It never ends.

Third Time's a Charm


A while back I posted about needing to make a maternity bathing suit and what I thought I might need to do. I started off enthusiastically to make the "Rimini" tankini top from the Spring/Summer 2011 issue of Ottobre Woman. Knowing that I have a larger-than-average bust, I measured my full bust and it ended up being the largest size - a 52 - so I traced the pattern in that size, cut it out and sewed up the 'bra' portion of the top. It was waaaaaayy too big around my ribs and the gap in the front where the two pieces were intended to cross over was so big that I was falling out of it, but I still didn't have enough fabric in the cups to properly cover myself and get any support. I fiddled around with it, trying to figure out what went wrong and then gave it up for a while to focus on some other projects.

I went back to the tankini when we had an unusually warm week in early May. This time I decided to add fabric to the cup area by slashing the size 52 pattern to the bust apex and spreading it. This had the effect of  tightening/shortening up the curve at the front and lessening the gap there, as well as giving me slightly more coverage at the side. I cut this new version of the 'bra' portion and found that there still wasn't enough support at the front and that it still gapped. I took out the stitches and overlapped the center fronts about twice as much as the first time. Now I had more coverage but it still was dragging down at the center front and kind of twisting. I took in the back by increasing the overlap, thinking that this would counter-act the problem at the center front, and it seemed better so I decided to add the lower portion of the tankini.

Disaster. I'd added way too much fabric at the center front and as a result there was far too much fabric in both the front and the back. I got upset because I really wanted this pattern to work and because I don't want to spend a ton of money on a maternity suit off the rack. Cheap suits generally don't give me the support I need in a bathing suit so I end up with a suit that costs $75 or more. I'm unwilling to pay that much for a maternity suit for my last pregnancy. So I decided to take a break and do some laundry and think about the problem.


The solution presented itself while talking the situation over with Scott. He was looking at the instructions and pointed out that while I needed the cup size of the 52, my underbust measurement was more like a size 46 or 48 (I fall kind of in the middle of the two). He also pointed out that I lost weight at the beginning of this pregnancy and haven't gained very much, so I'm clearly not a 52 all over. We decided that I should cut the 48 to allow for a little room for my belly to expand. That remedied the problem of the lower portion, but what about the bra portion? I played around with the 2nd version and decided the way to go was to sew the two pieces together so that there was a center front seam, then do the same thing at the back, after shortening the length of the back pieces so that they were more equivalent to a size 46. This gave me the coverage and support that I needed but in the size appropriate to my body frame.

Center back seam.


So here is the final product:

Don't make fun of the bathing cap - it keeps my new teal hair protected!

I ended up doing the center front and back seams, though I think I should have deepened the center front seam just a bit more. As it is, I hand-stitched it a bit to close up the neckline a little more so I didn't feel as though I would fall out of it. Also, if I make this again, I will reduce the amount of fabric under the arms at the sides, since the suit cuts into me slightly there. I decreased the amount of elastic that I used at the under bust portion significantly - I used about 24". I'd probably use even less next time, in order to have more support under the bust. And I'd probably find an underwire bra that I could sew into the lining, since I feel like I really don't have enough support with this, plus I'd probably retain the alterations I made but cut one size smaller in order to get more support out of the fabric itself. Right now it feels comfortable but I still wonder if there's too much give due to it being a 46. Cutting a 44 and still doing an FBA would probably be better overall, and I think I'd get a better lift for "the girls". I have more fabric (black with hot pink dots!) so I plan on perfecting the fit on this suit after the baby arrives.

Side view - 32 weeks pregnant.

It's better than a lot of suits I've worn, and I'd say it's not bad for a first attempt, but I'm not totally thrilled with the result. It gets the job done, though, and that's what's important. I probably added a bit too much to the bottom portion in order to accommodate the growing bump because the overlay pulls down a bit at the center front and the shirring doesn't lie evenly. Again, not a huge problem, since the suit is still quite functional.  What I love most is that it pretty much stays down over my belly and sort of looks like a retro one-piece suit, a style I really like.


The bottoms themselves were much easier - I cut a size 52 to see if that would cover my bum and still give me plenty of room for the belly. I was expecting to have to make some significant alterations but I was pleasantly surprised that they fit perfectly the first time. I used the bikini bottom pattern, rather than the boy-short bottom, and I found that the height of the leg opening was just right for me and it has a nice full-coverage back. I don't find myself having to adjust the fabric on my bum to keep it covered, so that's a definite plus.


Thursday, July 11, 2013

Stuck in a Holding Pattern

Hold on there, kiddo. It won't be much longer!

Nothing new sewn. Nothing. It's killing me. I've spent the past 2 weeks trying to just find time to get into my sewing room, now that it's moved from the old room into what was once the storage room. I can't find the time. Or the energy. Or both, I don't know. I do know that I have a few things left that I really want to sew while I'm still pregnant, and I have to finish the summer SWAP for the boy. But this pregnancy has left me more than a little drained and I'm starting to really feel it. I've said it before - Pregnancy after 40 is not for wimps. This is especially true since Scott is gone for the next month. I'll reach the 33 week mark on Friday and I won't see him until I reach week 36. The children have lost their minds because it's summer and Daddy is gone and they know I'm exhausted. Lucky for me Miss Maeve is at camp right now - at least for the next few days. And tomorrow - tomorrow Scott's replacement shows up. And by replacement, I mean his mom.

C. and I don't have tons in common, but she's my mother-in-law and she's available to help out for once. And for once I mean, this one time. Last time we asked her to come and help was when I was pregnant with Tallon and she told us she didn't think she'd be able to come and help because she couldn't take time off of work. I don't know what Scott said to her this time, although she's retired now so work isn't an excuse she can use. Her main work is usually taking care of the other grandkids, Scott's sister's twins who are 8 1/2. She spends a lot of time taking them to their various tennis, violin and swim lessons, and I don't know what-all else. Scott must have been convincing, though, and I'm glad because I'm far too pregnant to be dealing with my 3 crazies alone and trying to run a house. I'm not too proud to admit that. Scott left on Sunday and I'm already drained and it's only Wednesday.

So tomorrow we pick C. up at the airport and then run errands on the way home, get our CSA box for the week at the Farmer's Market, eat lunch (I promised the kids we'd eat at the market) and then we're back to the house for a brief time before gymnastics. It promises to be a busy day. Friday will sort of be a day of rest, though we do have a Daisy scout meeting here in the late afternoon that day. Then C.'s help will start off with a bang on Saturday morning, since I have to pick up Maeve at camp while she takes the other 2 to their swim lesson. Tallon, I promise, will tire her out just by being himself.

The rest of the time, though? I'm going to put her to use as much as possible so that I can get back in the sewing room. I figure that she's probably got more energy than me right now, even if she is 65. If she can take charge of even half the stuff to do with the kids (especially baths and bedtime) I'll have more time to get to things that need doing around here. Plus, the more she takes them to the park and whatnot, the less cleaning I have to do in the house. And that's always a plus. Additionally, I'm starting to get into that nesting mode and I want to have everything clean and tidy before the new one makes his appearance. I know realistically it won't be like that, but if I can sort of have things the way I want them I'll feel a lot better.

On the fun side, I dyed my hair teal back in June and love the color. It started to fade a bit towards the end of the month, so I brightened it up the other day and I love it.

Tuesday, June 4, 2013

Ahoy, Matey!


So, my girl is not the girliest of girls. She likes pirates. I think she has a secret desire to be like Pippi Longstocking. Back in 2010, I made Miss G a pirate girl outfit for her birthday present. She's since outgrown that one and was begging me for a new one. Since the whole thing was based around a velour iron-on that I'd found at Bunte Fabrics it would have been a bit difficult, but for the fact that before Yvonne closed her shop, I managed to score another one, plus a boy version.


Left sleeve.
Right sleeve.
The shirt is basically the same as last time -  I used the Imke pattern from Sewing Clothes Kids Love and I made it in a faux 2-layer style, with the pointy version of the hood. The short-sleeves and the body of the shirt are a black rib knit and the sleeves and hood are red and white cotton-lycra - both left over from the previous shirt. Like last time, I managed to get a red velour pirate skull iron-on (plus one to go with the boy pirate for Mr. T) and that goes on the right short sleeve; the long sleeve has 2 layers of ribbon - the bottom layer is black grosgrain with white pick stitching and the top layer is light blue with red stars. The star one is from Farbenmix. On the left long sleeve is a stripe of pirate boys and girls ribbon that I got from Banberry Place; the short sleeve has iron-on stars of various sizes in a red holographic vinyl. The hood has a tassel of several different ribbons, including the stars ribbon and the pirates ribbon.

Ribbon tassel on the hood.
The previous pirate girl outfit had a skirt, made from black denim with embroidered skull-and-crossbones motifs in white. This time I opted for pants. I'd been wanting to make the Farbenmix Nonita pants pattern for a while - how can you not love a pant called 'piratenhosen' (pirate pants) by its' maker? I knew I didn't have enough of the denim from the skirt, so I found some stretch red denim and used that for the main fabric, with the embroidered black denim as accents. I like how they turned out, though the denim is pretty stiff; hopefully it'll get softer as it gets worn in. I really like the look of some of the topstitching done by others on these pants, so I tried to go for a similar look. I'm not entirely happy with the look but that's probably because I had to use doubled thread, since I didn't have white topstitching thread. Also, I don't know if I'd use the thicker thread for the more complicated stitch patterns on such a heavy fabric again. They probably would have been fine with a single thread.

Pirate pants- front.
Pocket on left leg and ribbon detail on cuff.
The other thing I had a problem with was fit, but my girl is so skinny that I'm kind of not surprised that the waist is a bit big on her. This is often the case with the Euro patterns when I make them for her. There's always a good amount of ease and sometimes I have to compensate for that. After one or two wears we decided to undo the waistband a tiny bit and redo the elastic. The fit is much better now. The buttons were the coolest part, since I discovered them by accident at JoAnn's. The pirate skulls appear to be printed on them, but I'm hoping they won't rub off in the wash.
Topstitching detail, skull and crossbones buttons, pirate ribbon and Farbenmix label.
 The pants look super cute with the cuffs rolled up, since that exposes the pirate denim on the underside. And they look great with boots, sneakers, clogs or pretty much any other shoe. Miss G. likes to wear her pirate print clogs with them. I kind of want to use this pattern to make pants for my son's pirate boy outfit, but I'm not sure the fit would be good for his body. I do think it will be fun to make another pair of these for G. in a lighter weight cotton for summer. First, though, I need to finish some other projects!

Stars and Stripes


Ideally, this post should have been written back in September, except I forgot about it. I mean, I do a lot of sewing but don't always end up documenting it as I go along or even right after I finish it. I'm working on changing that, but it's a process.


This outfit for Miss Gwyn (who else?) was actually her first day of school outfit, and I stayed up all night to finish it - literally. The birds were singing when I went to bed. Anyway, she had asked me for "an adventure skirt" and had chosen a star-print twill from JoAnn's. After perusing my Ottobre magazines I found the perfect pattern - #14 in the 1/2005 issue. It's a pretty quick and easy pattern but with a lot of topstitching. I used a yellow thread, since yellow is her favorite color.


She needed a top to go with it, so we went with the ever-popular Farbenmix Imke (or was it Antonia? I don't remember now!), with hood and short, puffed sleeves. The green and white striped knit I had in my stash, grabbed from the bargain table at G Street Fabrics in Rockville, MD back when we lived on the east coast. It was a huge piece, but at $2.97/yard you really can't go wrong, can you?

Shirt front detail.
Anyway, the green matches the green stars in the skirt perfectly but it's a bit plain, so we added some iron-on stars in red holographic foil and some Farbenmix ribbon. I'm not sure what the middle ribbon is called, but it's still available at the Farbenmix online shop. The other two both have stars - light blue with red and orange with red, also available at Farbenmix and at Banberry place, respectively. Because, you know, you can't have too many stars. The hood on this shirt is the pointy version, naturally, and it has a tassel of the 3 ribbons that I used on the front of the shirt. I like that these two pieces are easily worn separately - I think she's worn the skirt with a solid red shirt and the striped shirt goes with any jeans, so she doesn't always feel like she needs to keep them together as an outfit. I think that they'll fit well through the summer, but Miss G. has had a slight growth spurt lately, so it may not last into the next school year.